This post may contains affiliate links. Read our full disclosure here.
When I started collecting art prints and vintage finds, I quickly learned that standard picture frames don’t always work for unique pieces. Whether you’ve got an odd-sized photograph, a vintage poster, or artwork you’ve created yourself, learning how to create custom picture frames can save you hundreds of dollars compared to professional framing services. After working in both the wine and home decor industries for several years, I’ve picked up some practical tricks that make custom framing accessible to anyone with basic tools and a little patience.
The beauty of how to create custom picture frames is that you can match any artwork perfectly while staying within your budget. I remember when my boyfriend and I bought our first home together – we had this gorgeous vintage wine advertisement from France that was 13″ x 19″, and no store-bought frame would accommodate it properly. That’s when I realized the importance of mastering this skill for creating a truly personalized space.
Essential Tools and Materials for How to Create Custom Picture Frames
Getting started with how to create custom picture frames doesn’t require a full woodworking shop. Here’s what you’ll need for most projects:
Basic Tool Kit:
- Miter saw or miter box with hand saw – For precise 45-degree cuts
- Measuring tape and steel ruler – Accuracy is everything
- Corner clamps – To hold pieces while glue dries
- Wood glue (Titebond is highly recommended)
- Small hammer or nail gun
- Sandpaper (120 and 220 grit)
- Safety glasses and dust mask
Materials You’ll Need:
- Picture frame molding (available at home improvement stores)
- Glass or acrylic glazing (cut to size)
- Backing board (MDF or chipboard)
- Picture hanging hardware
- Glazing points or frame clips
External Resources:
- Professional Framing Supplies: Framing 4 Yourself
- Mat Cutting Tutorials: Frame Destination
- Hardware and Tools: The Home Depot
The total cost for materials typically runs $15-30 per frame, depending on the molding you choose. When I think about professional framing quotes I’ve received (often $150-300 for custom work), the savings become obvious pretty quickly.
Measuring Your Artwork: The Foundation of Success
Before you can master how to create custom picture frames, you need to understand proper measuring techniques. This step determines everything else in your project.
Step-by-Step Measuring Process:
- Measure your artwork precisely – Use a ruler and measure width x height to the nearest 1/16 inch
- Add the rabbet allowance – The rabbet is the groove that holds your artwork; add 1/8″ to each dimension
- Calculate your outer frame dimensions – Add the width of your molding (usually 1-3 inches) to each side
For example, if your artwork is 13″ x 19″, your rabbet opening should be 13 1/8″ x 19 1/8″. If you’re using 2″ wide molding, your outer frame dimensions would be 17 1/8″ x 23 1/8″.
Pro tip: Always double-check your measurements before cutting. I learned this the hard way when I miscalculated a frame for a wedding photo I was helping my sister display – thankfully, I caught the error before making the cuts!

The gallery wall ideas I’ve implemented in my own home often require custom frames because vintage pieces and family photos rarely come in standard sizes.
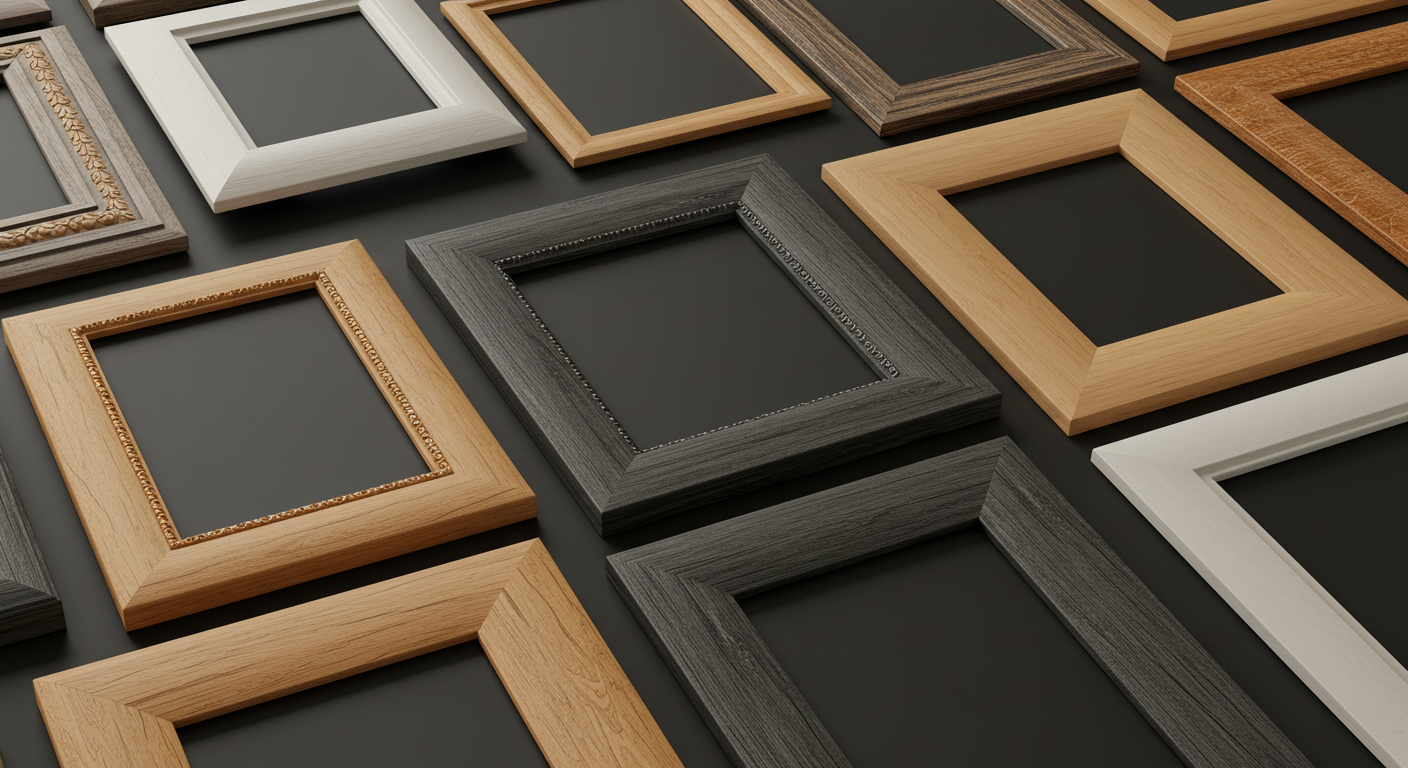
Choosing the Right Molding for Your Project
Understanding how to create custom picture frames means knowing which molding works best for different artwork types. The molding you choose affects both the look and the complexity of your project.
Popular Molding Options:
Traditional Wood Molding:
- Best for: Classic artwork, family photos, vintage pieces
- Sizes: 1/2″ to 4″ wide profiles
- Cost: $3-15 per linear foot
- Requires: Miter cuts, wood glue, finishing
Simple Flat Stock:
- Best for: Modern art, photography, minimalist spaces
- Sizes: 1×2″ to 1×4″ lumber
- Cost: $2-6 per linear foot
- Requires: Basic cuts, stain or paint
Decorative Molding:
- Best for: Ornate artwork, mirrors, formal pieces
- Sizes: Various profiles 2-6″ wide
- Cost: $8-25 per linear foot
- Requires: Careful handling, detailed finishing
When I was working on interior design ideas how to make cheap furniture look custom, I discovered that matching your frame molding to existing trim work in your room creates a cohesive, professional look.
The Step-by-Step Process: How to Create Custom Picture Frames
Now for the hands-on part of how to create custom picture frames. This process works whether you’re framing a single piece or creating multiple frames for a gallery wall.
Step 1: Calculate Your Cutting List
For a frame with outer dimensions of 17 1/8″ x 23 1/8″:
- Two pieces at 17 1/8″ (top and bottom)
- Two pieces at 23 1/8″ (left and right)
- Add 2-3 inches to each measurement for waste allowance
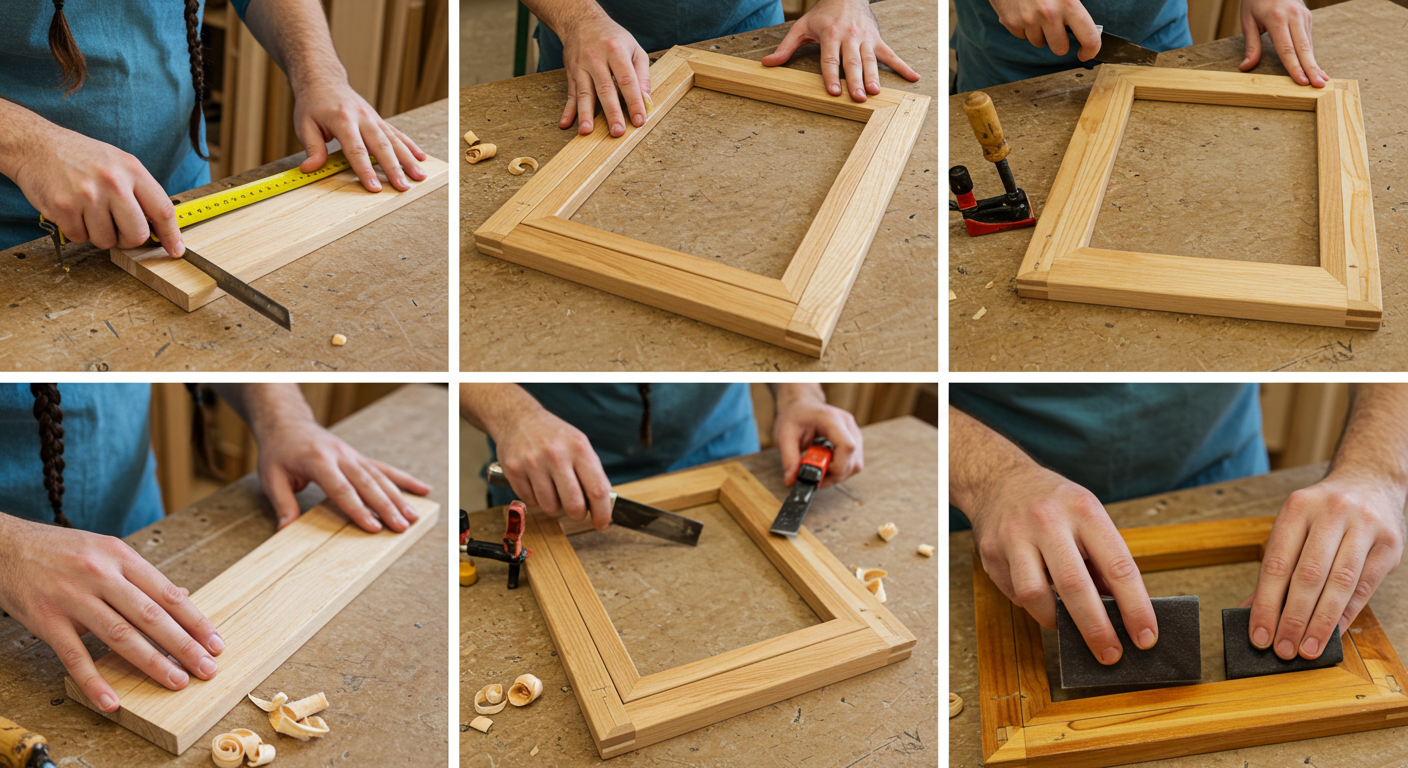
Step 2: Cut Your Molding
Set your miter saw to 45 degrees and cut each piece with the long point matching your calculated dimensions. The key is consistency – all your 45-degree cuts need to be identical for tight joints.
Step 3: Test Fit Before Gluing
Dry-fit all four pieces together. The corners should align perfectly with no gaps. If you see gaps, double-check your cuts and adjust if necessary.
Step 4: Apply Glue and Clamp
Apply a thin bead of wood glue to each miter joint. Use corner clamps to hold the frame square while the glue dries. This usually takes 30-60 minutes.
Step 5: Reinforce the Joints
Once the glue is dry, you can add small finishing nails or screws from the back for extra strength. This is especially important for larger frames.
The chic diy home decor projects I’ve tackled often benefit from custom frames because they allow you to match your exact color scheme and style preferences.
Working with Non-Standard Artwork Sizes
This is where how to create custom picture frames really shines. Non-standard sizes are exactly why custom framing exists.
Common Non-Standard Scenarios:
Panoramic Photos:
- Often 12″ x 36″ or similar ratios
- Requires wider molding for stability
- Consider float mounting for modern appeal
Square Artwork:
- Instagram prints, album covers, art prints
- Often 12″ x 12″, 16″ x 16″, 20″ x 20″
- Perfect for grouping in sets
Vintage Posters:
- European sizes like A3 (11.7″ x 16.5″)
- Concert posters, travel prints
- Often benefit from wider matting
Handmade Art:
- Watercolors, drawings, small paintings
- Irregular edges that need float mounting
- Varies widely in dimensions
For pieces with irregular sizes, I’ve found that float mounting creates the most professional appearance. This technique makes the artwork appear to “float” above the backing, showing all edges of the piece.
Working on bohemian home decor diy projects has taught me that eclectic artwork often comes in unusual sizes, making custom framing essential for achieving that curated, collected-over-time look.
Creating Custom Mats for Perfect Proportions
Understanding how to create custom picture frames includes mastering custom matting, which is often necessary for non-standard artwork sizes.
Mat Cutting Basics:
Tools for Mat Cutting:
- Rotary mat cutter or utility knife
- Metal straight edge (at least 36″ long)
- Cutting mat (self-healing type)
- Mat board (acid-free for archival quality)
Calculating Mat Dimensions:
The general rule for mat proportions is to make them 1.5 times wider than your frame molding. For a 2″ wide frame, use a 3″ mat border. However, you can adjust this based on your artwork and personal preference.
Mat Cutting Process:
- Measure your artwork and frame opening precisely
- Mark your mat board with light pencil marks
- Score the mat with firm, consistent pressure
- Complete the cut with the mat cutter at a 45-degree bevel
- Test fit before finalizing
I’ve learned that slightly wider mats on the bottom (about 1/4″ extra) create better visual balance, especially for photography. This technique, called “weighted matting,” prevents the optical illusion of the artwork appearing to sink in the frame.
The rustic home decor on a budget aesthetic I love often incorporates handmade elements, and custom matting allows you to use natural or textured mat boards that complement the rustic style.
Advanced Techniques: Float Mounting and Creative Solutions
Once you’ve mastered the basics of how to create custom picture frames, float mounting becomes your secret weapon for showcasing artwork in ways that standard framing simply can’t achieve. This technique creates the illusion that your artwork is suspended above the backing, making it particularly stunning for pieces with interesting edges or unique textures.
Float mounting works beautifully when you want to display the entire piece of artwork, including its natural edges. Think watercolor paintings with organic borders, handmade papers with deckled edges, or photographs that have distinctive white borders you don’t want to hide. The technique involves mounting your artwork on a backing board while leaving space around all edges so the entire piece remains visible.
What You’ll Need for Float Mounting:
- Uncut mat board sized to fit your frame
- Archival mounting tape or photo corners
- Foam core spacers (optional, for added dimension)
- Backing board cut to frame size
The process starts with positioning your artwork on the mat board, ensuring equal spacing around all edges. The key is securing the artwork with archival materials on the back edges only – never use regular tape or adhesive that touches the front of your artwork, as this can cause permanent damage over time.
For artwork with multiple pieces or when you want to create a gallery-style display, you can design custom mats with multiple openings. This approach works wonderfully for photo series, small art collections, or mixed media displays. The technique allows you to tell a visual story within one frame rather than having multiple smaller frames competing for wall space.
When working on minimalist home decor projects, float mounting aligns perfectly with that clean, uncluttered aesthetic. The technique creates visual breathing room around the artwork while maintaining focus on the piece itself.
Troubleshooting Common Challenges
Even experienced framers encounter obstacles when learning how to create custom picture frames. The most frequent issue you’ll face is getting perfectly tight miter joints – those tiny gaps in the corners that can make an otherwise beautiful frame look unprofessional.
When miter joints don’t fit perfectly, the problem usually stems from sawdust buildup in the joint or slight inaccuracies in the cutting angle. Here’s how to address these issues:
For Gap Issues:
- Clean both joint surfaces with fine sandpaper
- Ensure both surfaces are perfectly flat
- Apply wood filler after gluing if gaps persist
- Sand smooth when dry for invisible repairs
For Frames That Won’t Stay Square:
- Check all cuts with a framing square before gluing
- Adjust clamping pressure and technique
- Use corner clamps designed for picture frames
- Verify that opposite sides are identical lengths
Glass fitting problems often arise because frame openings aren’t perfectly rectangular, especially with handmade frames. The solution involves measuring the actual opening rather than assuming it matches your calculations, and sometimes lightly sanding the rabbet to create a perfect fit.
Working with the affordable home decor ideas approach means problem-solving becomes part of the creative process. Many challenges can be turned into design opportunities when you approach them with flexibility and creativity.
Budget-Smart Sourcing and Cost Management
Learning how to create custom picture frames economically makes this skill sustainable long-term. The key is knowing where to find quality materials at reasonable prices and when to invest in better components.

Loire Valley France Wine Region Canvas Wall Art – Elegant Black and White Typography Print for Wine Lovers and Home Decor
Home improvement stores offer the best combination of selection and competitive pricing for most projects. Their molding sections typically carry everything from basic flat stock to decorative profiles, with bulk pricing available when you’re working on multiple frames. The clearance sections often have end cuts and discontinued styles that work perfectly for smaller projects.
Smart Shopping Strategies:
- Buy materials in bulk when possible to reduce per-foot costs
- Reuse glass from old frames when dimensions work
- Shop thrift stores for frames you can repurpose
- Order custom glass cutting in batches for multiple projects
Online specialty framing suppliers provide professional-quality materials that aren’t available at general retailers. While the initial cost may be higher, the quality difference is noticeable, especially for archival matting and conservation-grade mounting materials.
For those working on rustic home decor on a budget projects, architectural salvage yards and reclaimed wood suppliers offer unique molding options that add character while staying cost-effective.
When to DIY vs. Professional Services
Understanding how to create custom picture frames includes knowing when your skills are sufficient and when professional services provide better value. Most home framers can handle standard rectangular frames, simple matting, and artwork with moderate value successfully.
Consider professional framing for valuable artwork where insurance concerns matter, complex conservation requirements, or when you need specialized glazing like museum glass or UV protection. Intricate matting with multiple openings or curved specialty frames also benefit from professional expertise.
Perfect for DIY Projects:
- Personal photographs and prints
- Decorative artwork under $200 in value
- Standard rectangular frames in any size
- Simple matting projects
Consider Professional Services:
- Valuable or irreplaceable artwork
- Complex conservation needs
- Specialty glazing requirements
- Insurance considerations
The decision often comes down to balancing cost, time, and the importance of the piece you’re framing. Most home decorators find that handling 80% of their framing projects personally while outsourcing the most challenging or valuable pieces creates the best overall results.
Mastering how to create custom picture frames opens up endless possibilities for personalizing your space while staying within budget. The techniques covered here will handle the vast majority of non-standard sizing challenges you’ll encounter, from panoramic photography to vintage finds that don’t fit standard dimensions. With practice, you’ll develop the confidence to tackle increasingly complex projects while achieving professional-looking results that perfectly complement your home’s aesthetic.