This post may contains affiliate links. Read our full disclosure here.
Soap Making for Beginners is a delightful journey that puts you in control of what goes onto your skin. When I first discovered this hobby, I was amazed by how simple yet rewarding it could be to create my own natural soap bars. No more mystery ingredients or questionable additives hiding in store-bought products! This comprehensive guide will walk you through everything you need to know about natural ingredients, safe techniques, and beginner-friendly methods to start your soap making adventure.
Whether you’re looking to create personalized gifts, embrace a more natural lifestyle, or simply try something creative and fun, soap making offers endless possibilities. The beauty of handmade soap lies in its uniqueness—each bar tells a story and carries your personal touch. Ready to get your hands (safely) dirty and create something beautiful and useful? Let’s dive into the wonderful world of Soap Making for Beginners!
Why Soap Making for Beginners is Worth Trying
Taking up soap making has been one of the most satisfying crafts I’ve tried. There’s something incredibly fulfilling about creating something both beautiful and practical with your own hands. Soap Making for Beginners offers complete ingredient control, letting you choose exactly what touches your skin—perfect for those with sensitivities or anyone looking to avoid harsh chemicals.
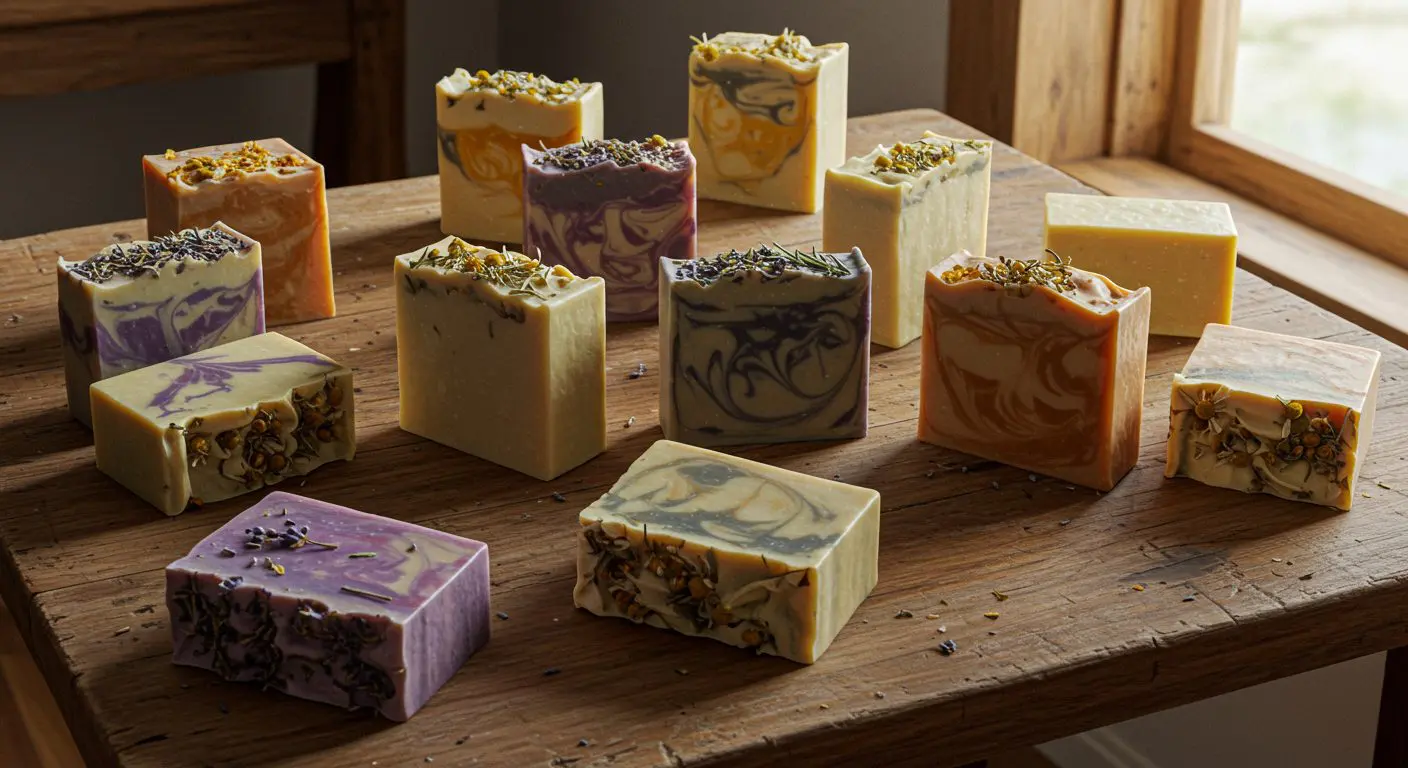
This craft also provides a fantastic creative outlet where you can experiment with colors, scents, textures, and designs. My bathroom now showcases a rainbow of homemade soaps that double as decorative elements! The process itself is surprisingly meditative, requiring focus and precision that helps me disconnect from daily stress.

“Your first batch won’t be perfect—but it will be yours. That’s the beauty of handmade soap.”
Another major benefit is the natural living aspect. Commercial soaps often contain synthetic detergents, artificial fragrances, and preservatives. When making your own, you can choose plant-based, sustainable ingredients that are gentler on both your skin and the environment. My skin has actually thanked me since switching to homemade soap—no more dryness or irritation!
Handmade soap also makes for thoughtful, personalized gifts. My friends always appreciate receiving custom soap bars tailored to their preferences. Whether it’s a calming lavender blend for a stressed colleague or an invigorating citrus bar for my early-rising sister, these gifts show care in a way store-bought items rarely can. If you enjoy creating personalized presents, soap making fits perfectly into your crafting repertoire.
Is Soap Making Safe?
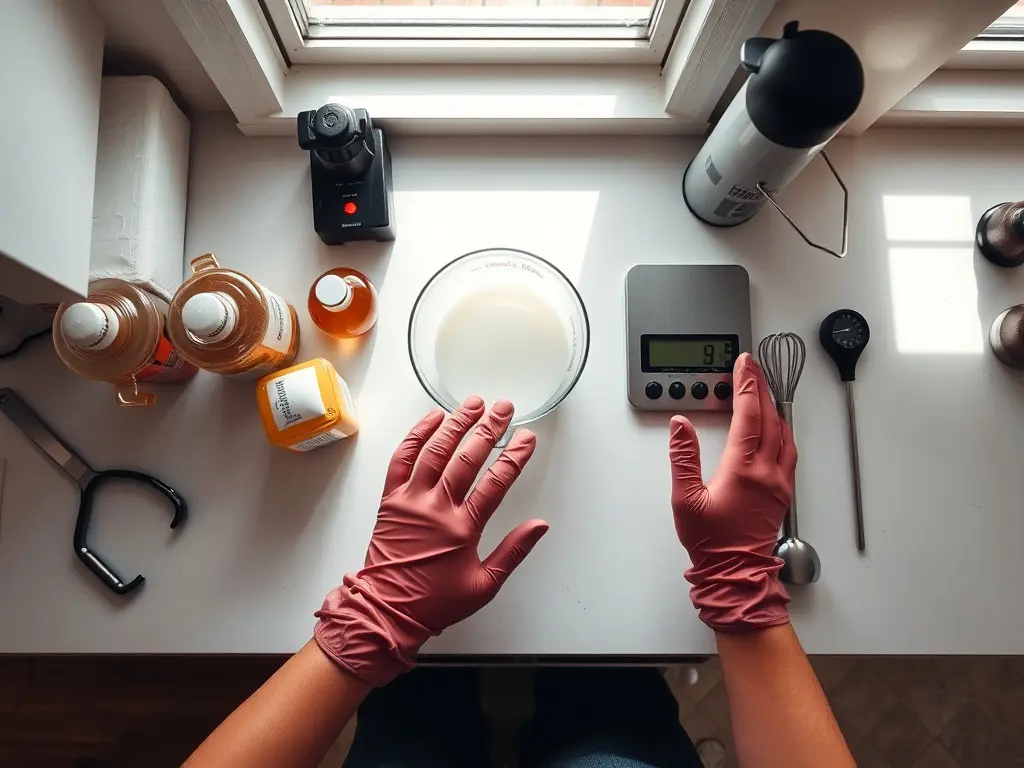
Safety is understandably the top concern when starting Soap Making for Beginners. Yes, it’s completely safe—but only when you take proper precautions. The main safety consideration revolves around lye (sodium hydroxide), which is essential for traditional soap making. While intimidating at first, lye can be handled safely with the right approach.
Always wear proper protective gear: gloves, safety goggles, and long sleeves are non-negotiable. My first soap making session happened in my tiny apartment kitchen, but I made sure to open all windows and turn on the exhaust fan for proper ventilation. The chemical reaction between lye and water creates heat and fumes that you shouldn’t breathe in.
Keep children and pets far away from your soap making area, especially when handling lye. I designate a specific corner of my kitchen as a “no-go zone” during soap making sessions. Always add lye to water (never the reverse!) and do so slowly while stirring—this prevents dangerous splashing and overheating.
If you’re nervous about working with lye, the melt and pour method is your perfect entry point. This technique uses pre-made soap bases that have already completed the lye reaction, making it the safest option for absolute beginners. Even in my small apartment, I found melt and pour to be completely manageable and stress-free for my first few batches. Safety doesn’t mean you can’t enjoy weekend DIY projects like soap making—it just means being prepared!
Choosing the Right Soap Method for You
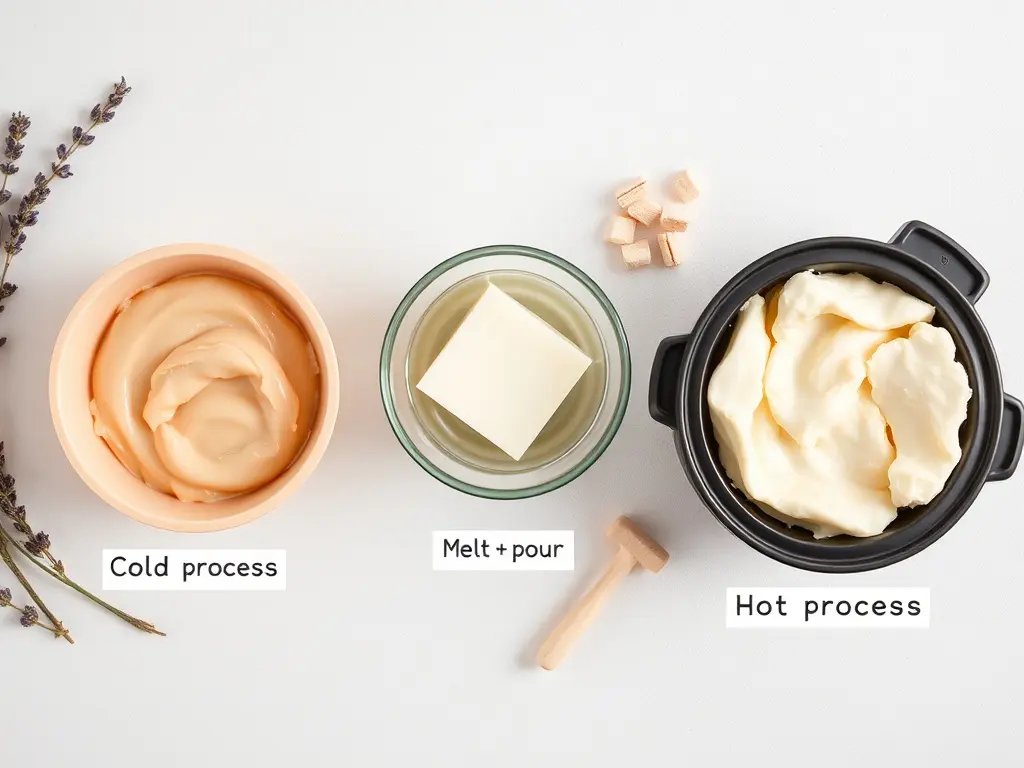
When I began Soap Making for Beginners, I was overwhelmed by the different methods available. Each technique has its own charm, learning curve, and time commitment. Understanding these differences helped me choose the right starting point, and it’ll help you too!
The Cold Process method is traditional soap making at its finest. It requires mixing lye with oils and allowing the chemical reaction (saponification) to occur naturally over time. This method gives you complete control over ingredients but demands more equipment, patience, and a 4-6 week curing time. While not the easiest starting point, cold process creates long-lasting bars with amazing lather.
| Method | Time Commitment | Equipment Needed | Skill Level |
|---|---|---|---|
| Cold Process | Medium-High | Immersion blender, scale, molds | Intermediate |
| Hot Process | Medium | Slow cooker | Beginner+ |
| Melt and Pour | Low | Basic kitchen tools | True beginner |
The Hot Process method speeds up saponification by cooking the soap mixture in a slow cooker. The benefit? Your soap is ready to use much sooner (1-2 weeks versus 4-6). The bars have a rustic, homemade look that many crafters love. This method sits comfortably between beginner and intermediate levels, making it a nice step up from melt and pour.

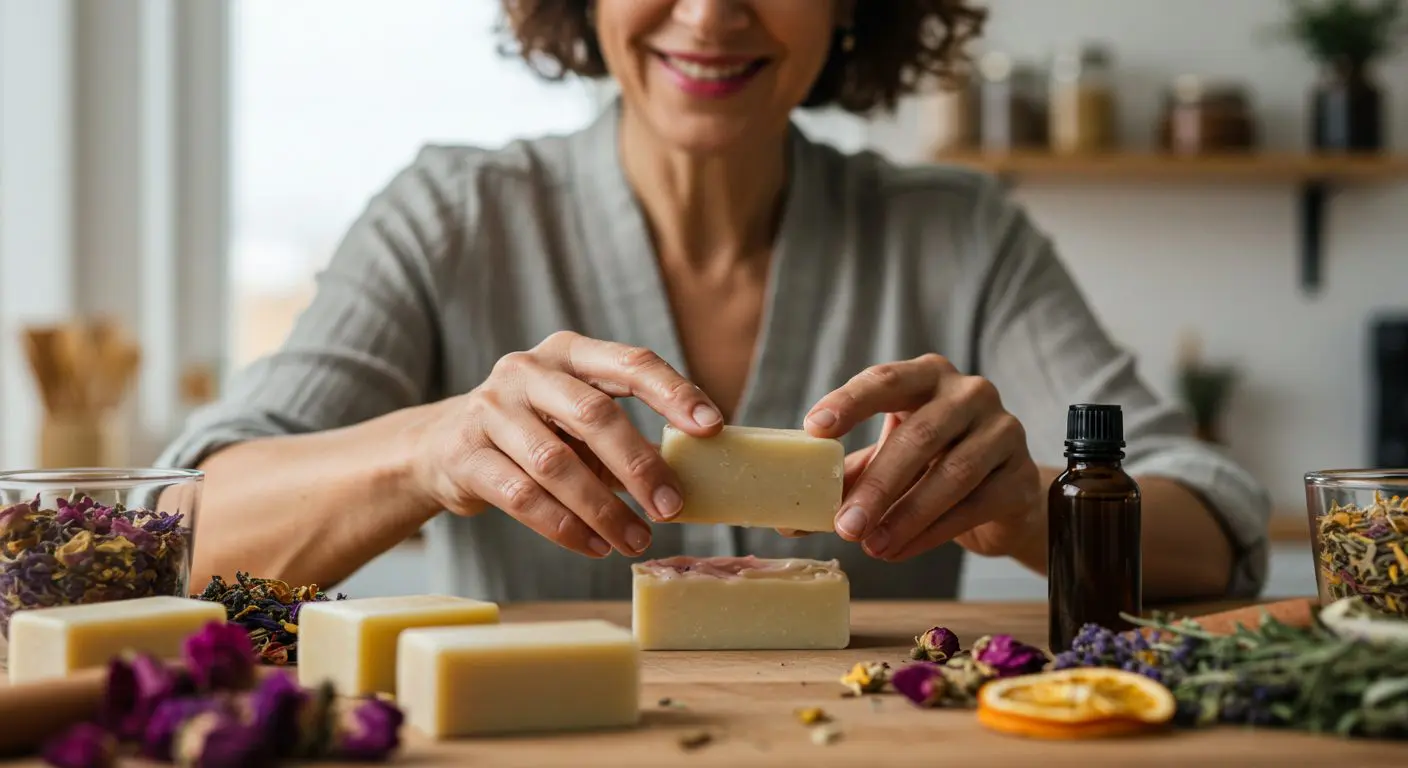
For true beginners, Melt and Pour soap is where I recommend starting. You simply melt pre-made soap base, add your chosen scents and colors, and pour into molds. The soap solidifies in hours and requires no curing time. My first project was a simple lavender melt and pour soap, and the immediate gratification kept me hooked! This method is also fantastic for creative craft combinations like embedding small wooden elements or dried flowers.
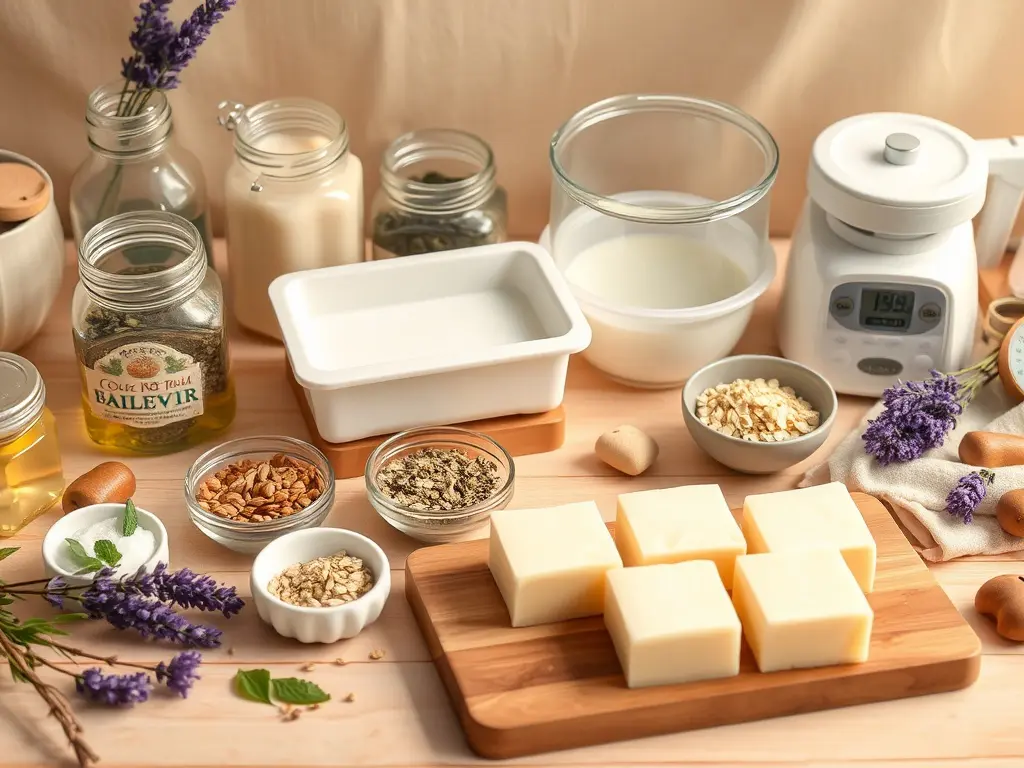
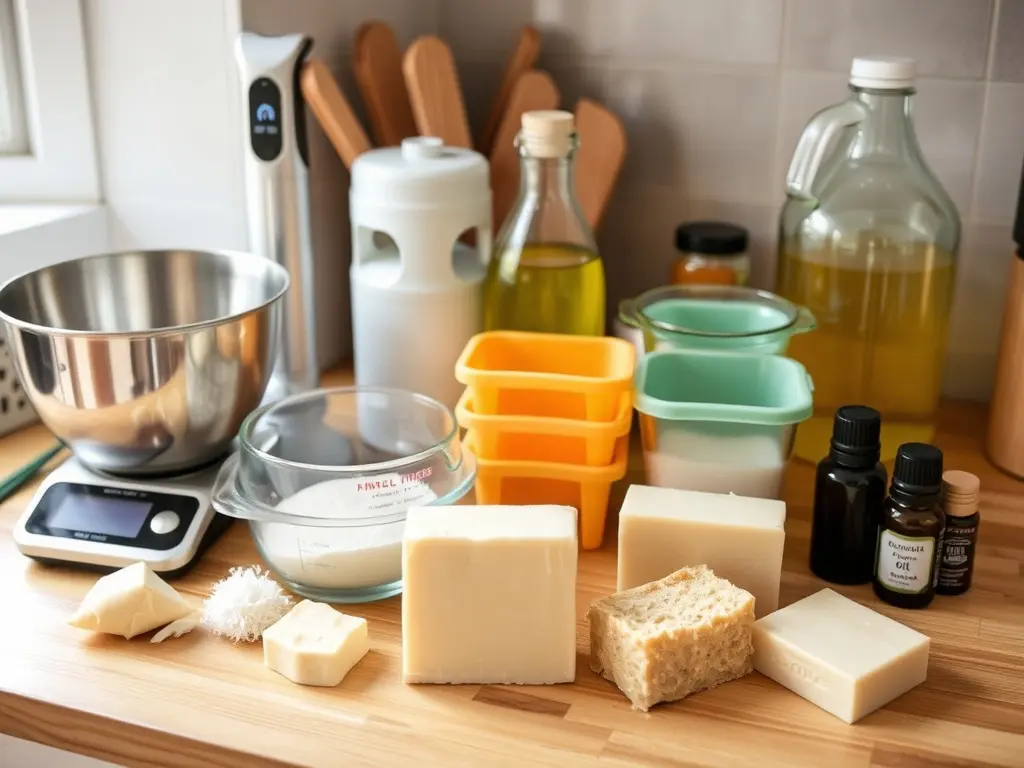
Tools Every Beginner Needs

Gathering the right equipment makes Soap Making for Beginners much smoother. You don’t need to break the bank, but having proper tools ensures safety and success. When I started, I invested in quality basics that I still use today.
First, a digital kitchen scale is absolutely essential. Soap making is chemistry, and accurate measurements make the difference between perfect bars and disappointing results. Look for a scale that measures in both ounces and grams with precision to 0.1oz or 1g.

Heat-resistant containers are crucial, especially for lye solutions. I use dedicated glass or heat-safe plastic bowls that never return to food service. For mixing and stirring, an immersion blender saves tremendous time and effort compared to hand stirring—achieving “trace” (when soap begins to thicken) can take minutes instead of hours.
- Silicone or wooden molds (lined with freezer paper)
- Thermometer to monitor temperatures
- Measuring spoons for small amounts
- Spatulas for scraping and mixing
- Safety gear: gloves, goggles, long sleeves
- Designated curing area (for cold/hot process)
Storage considerations are important too. Cold process soap needs a well-ventilated shelf for curing that won’t be disturbed for several weeks. My first batches cured on a bookshelf in my spare room, carefully arranged to allow air circulation around each bar. Creating soap is also a wonderful way to refresh your home decor with functional handmade elements.
Most importantly, never use your regular kitchen utensils for soap making—especially anything that touches lye. Cross-contamination could be dangerous, so keep soap tools completely separate. I store all my soap equipment in a plastic bin with a lid, ready for my next creative session.
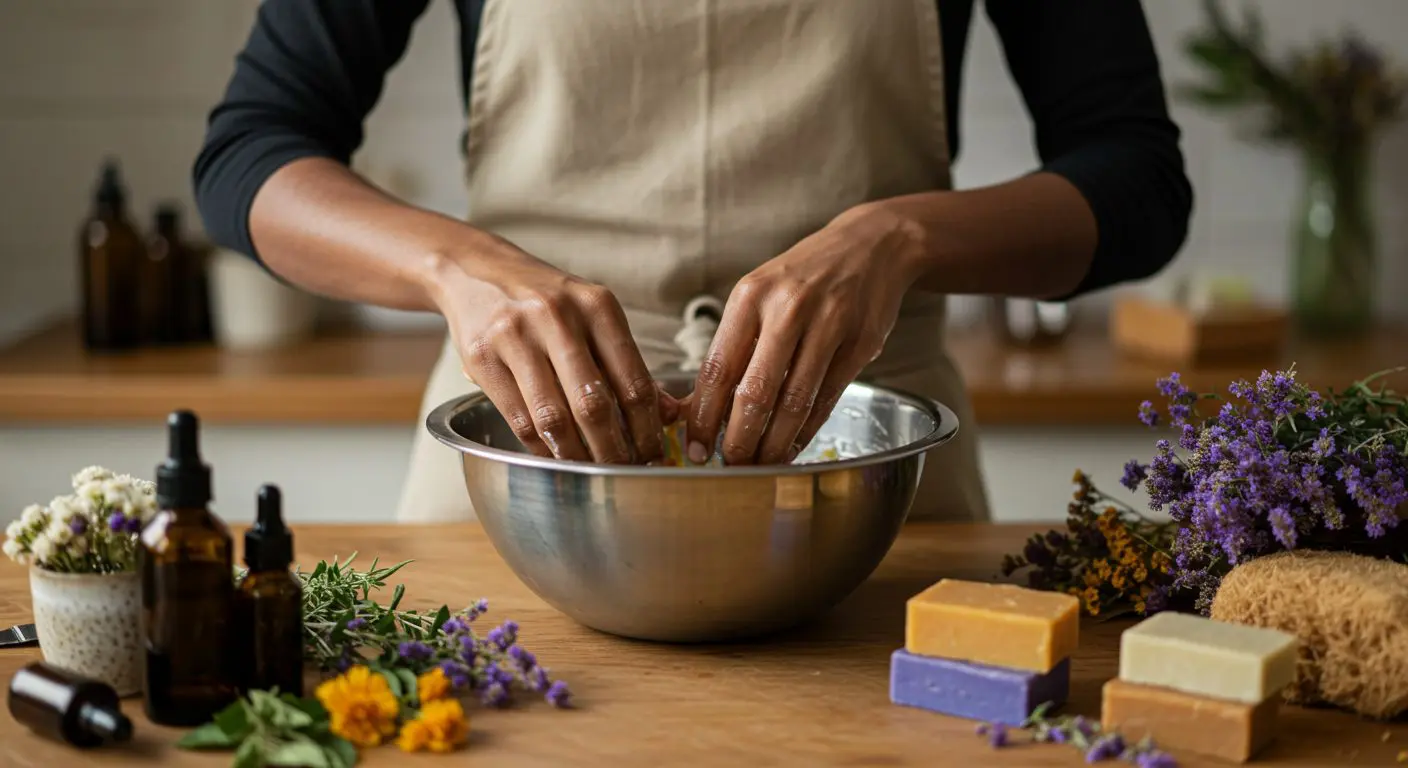
Common Ingredients Used in Natural Soap Recipes
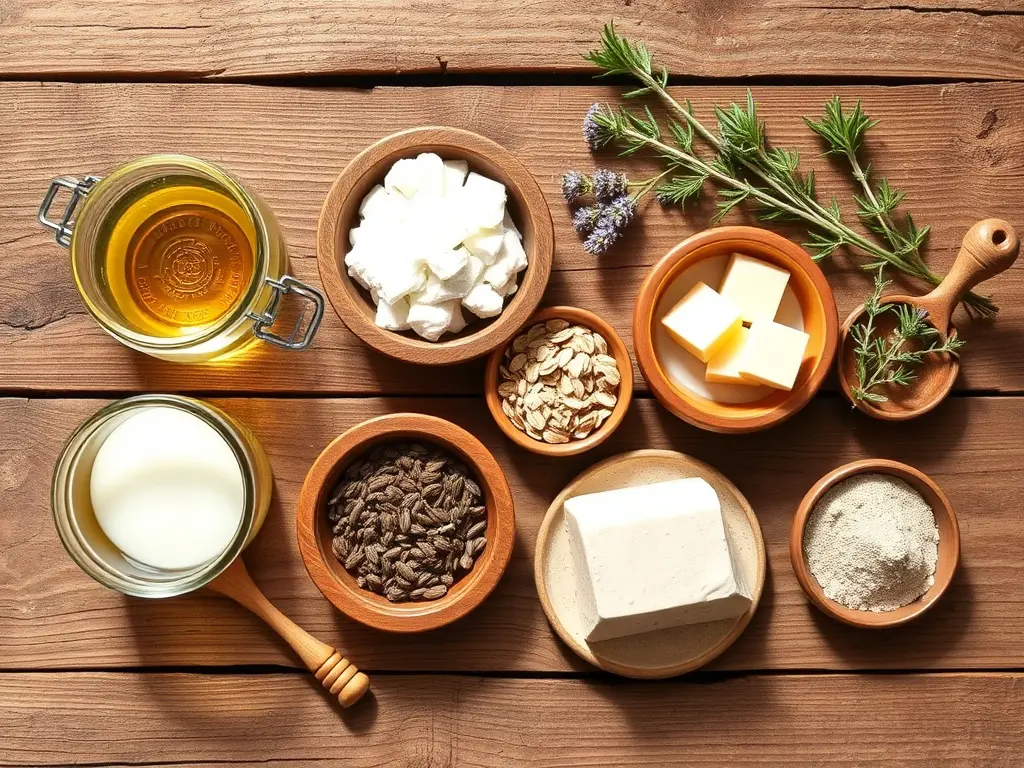
The beauty of Soap Making for Beginners lies in selecting gorgeous natural ingredients to create bars tailored to your skin’s needs. Each oil and butter brings different properties to your soap. Understanding these ingredients helped me create balanced recipes that cleanse gently while moisturizing effectively.
Olive oil is the backbone of many natural soap recipes. It creates a gentle, moisturizing bar that’s fantastic for sensitive skin. While olive oil produces less lather on its own, it contributes to a soap’s conditioning properties. This was the first oil I worked with and remains a staple in most of my formulations.
| Ingredient | Purpose | Why Use It |
|---|---|---|
| Olive oil | Gentle, moisturizing | Great base oil for beginners |
| Coconut oil | Cleansing, bubbly | Adds hardness and lather |
| Shea butter | Conditioning | Makes creamy and soothing bars |
| Castor oil | Boosts lather | Use in small amounts for bubble boost |
| Essential oils | Scent | Stick to lavender, citrus, peppermint |
| Additives | Color/texture | Clay, oats, dried herbs, charcoal |
Coconut oil creates wonderful lather and hardness but can be drying if used in high percentages. My favorite balanced recipe uses about 25-30% coconut oil combined with more moisturizing components. For luxury bars, I add shea or cocoa butter for their exceptional skin-conditioning properties. These create a creamy, soothing bar that’s perfect for dry skin.
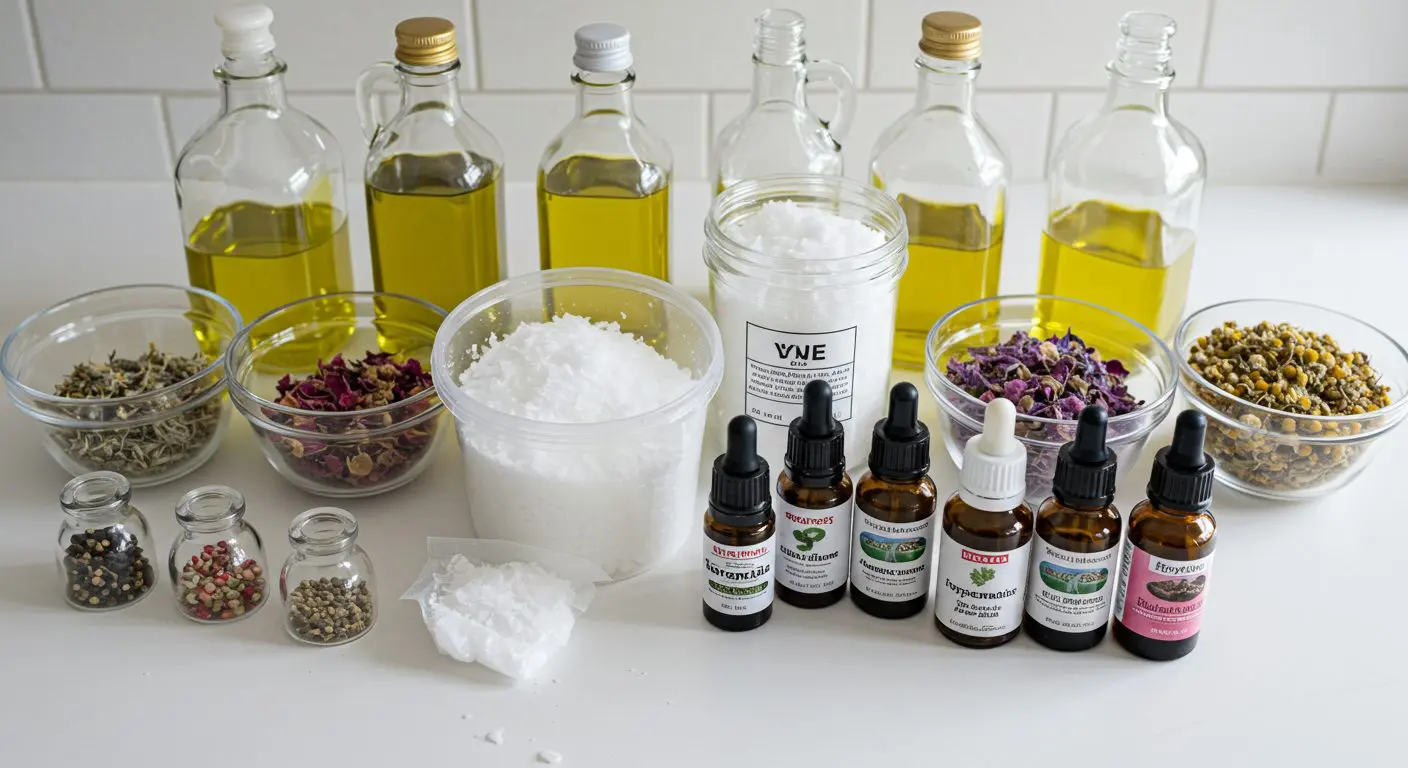
For scenting natural soaps, essential oils offer beautiful aromas without synthetic fragrances. Beginners should start with skin-friendly options like lavender (calming), peppermint (refreshing), or sweet orange (uplifting). Remember that some essential oils can accelerate trace, meaning your soap will thicken more quickly, so be prepared to work fast!
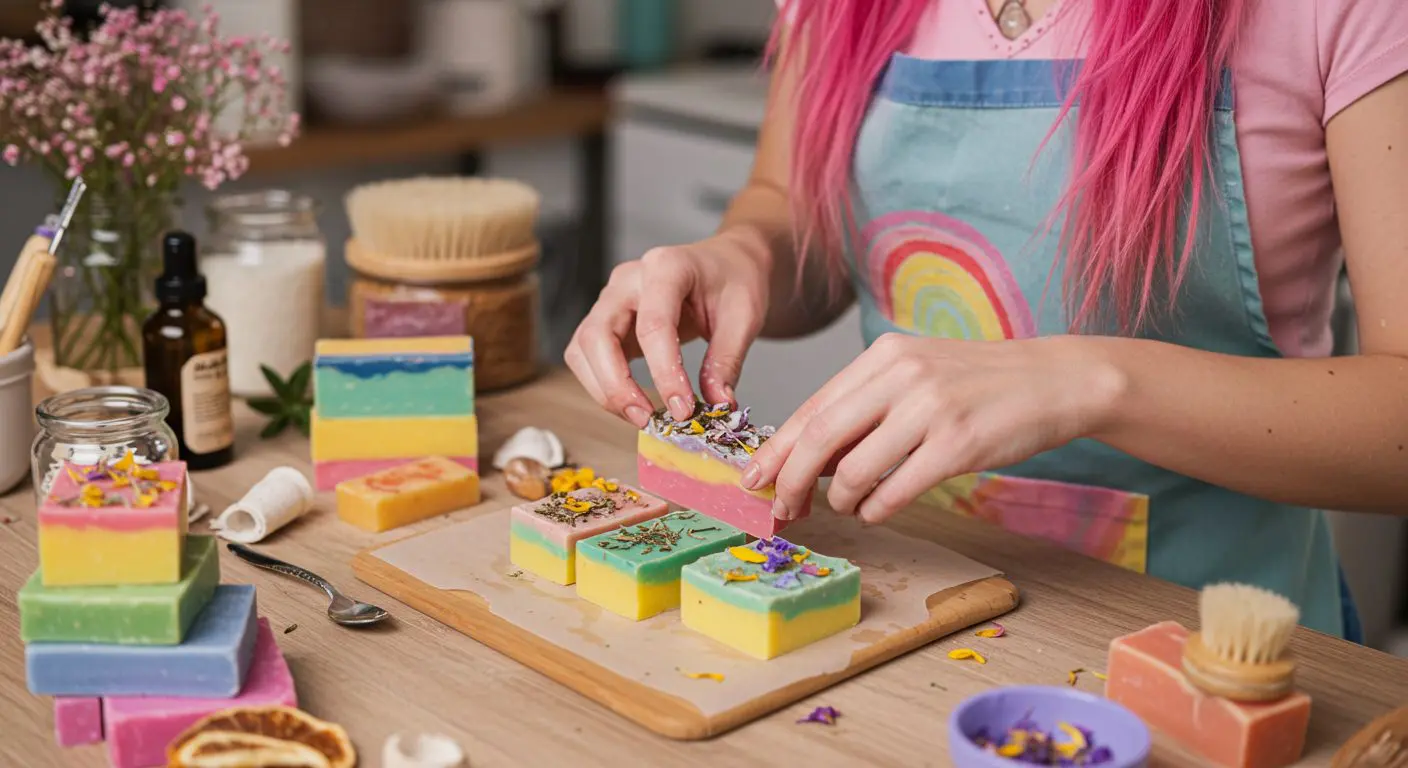
Natural colorants and additives can transform your soap both visually and functionally. Clays add silky texture and gentle exfoliation, while activated charcoal creates dramatic black bars with detoxifying properties. Dried herbs provide visual interest and light exfoliation. These natural elements can be incorporated into creative projects like wine-themed soap bars with grape seeds or wine-colored clay for a sophisticated look.
Method 1: Cold Process Soap for Beginners
Cold process soap making is where many enthusiasts eventually land after experimenting with simpler methods. This traditional approach to Soap Making for Beginners provides complete creative freedom and the most customization options. While it requires more patience than other methods, the results are worth it!
Here’s a beginner-friendly recipe that creates about 8-10 bars of moisturizing, gently cleansing soap:
| Ingredient | Amount | Purpose |
|---|---|---|
| Olive oil | 10 oz | Base oil |
| Coconut oil | 10 oz | Hardness |
| Shea butter | 4 oz | Creaminess |
| Sodium hydroxide (lye) | 4.3 oz | Required for saponification |
| Distilled water | 9 oz | Activates lye |
| Lavender essential oil | 0.7 oz | Scent |
| Optional: dried lavender | 1 tbsp | Texture |
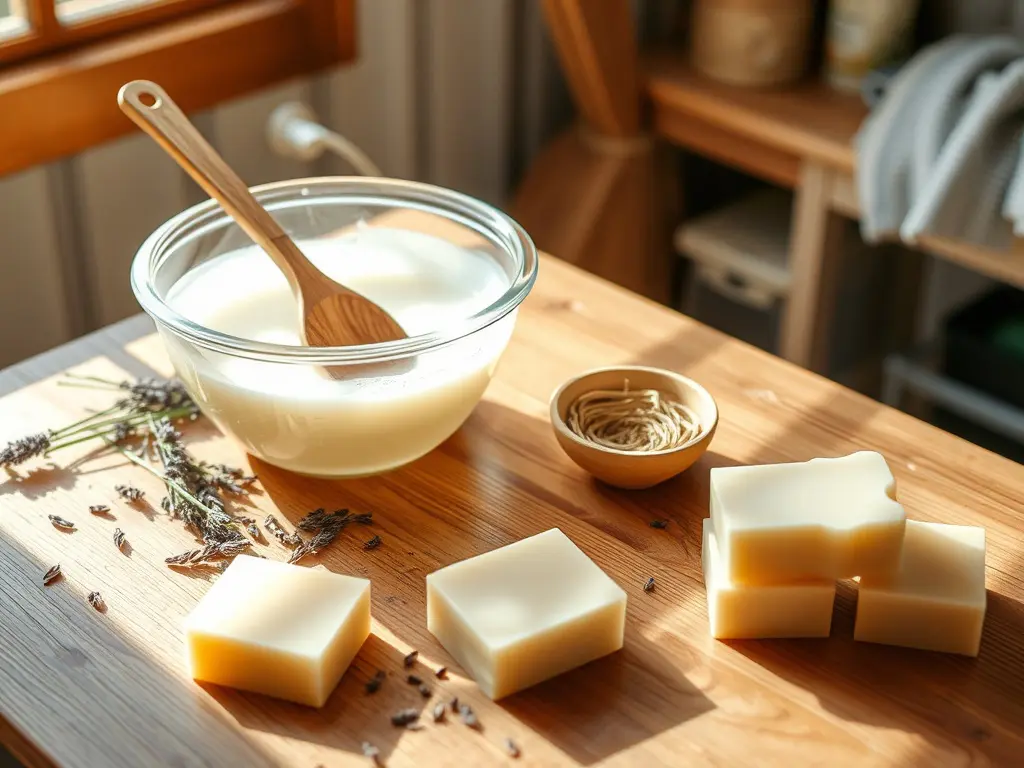
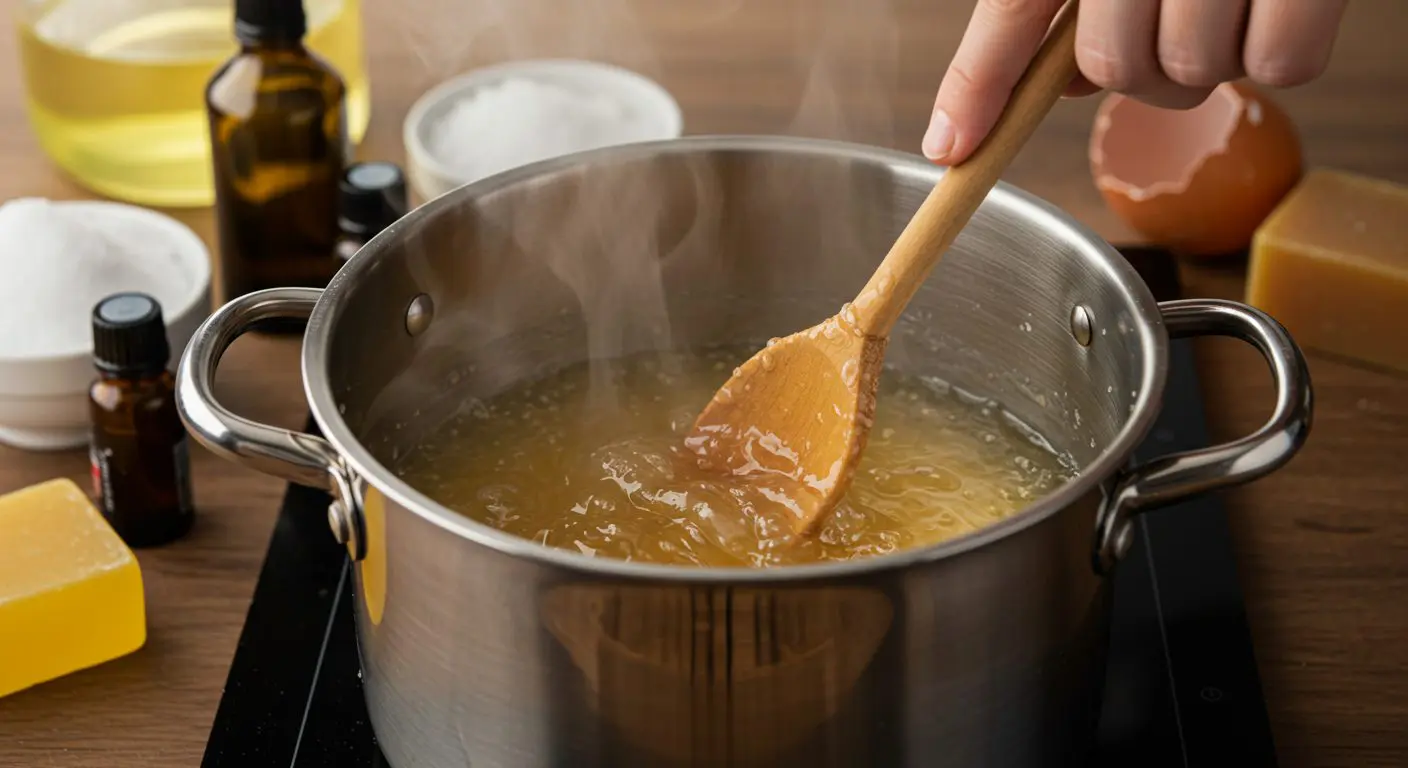
The process begins with safety. Gear up completely—gloves, goggles, and long sleeves are non-negotiable. Working in a well-ventilated area, carefully measure all ingredients using your digital scale. In a heat-resistant container, slowly add lye to water (never reverse this order!) and stir until dissolved. This creates heat and fumes, so step back while stirring. Let this mixture cool to approximately 110°F.
Meanwhile, gently melt your coconut oil and shea butter, then add the olive oil and allow this mixture to cool to around 100-110°F as well. Ideally, both your oils and lye solution should be within 10 degrees of each other when combined.
When both mixtures reach the target temperature range, slowly pour the lye water into the oils while stirring. Then use an immersion blender in short bursts to bring the mixture to “trace”—the point where it thickens like pudding and leaves a visible trail when drizzled across the surface. This usually takes 5-10 minutes of intermittent blending.
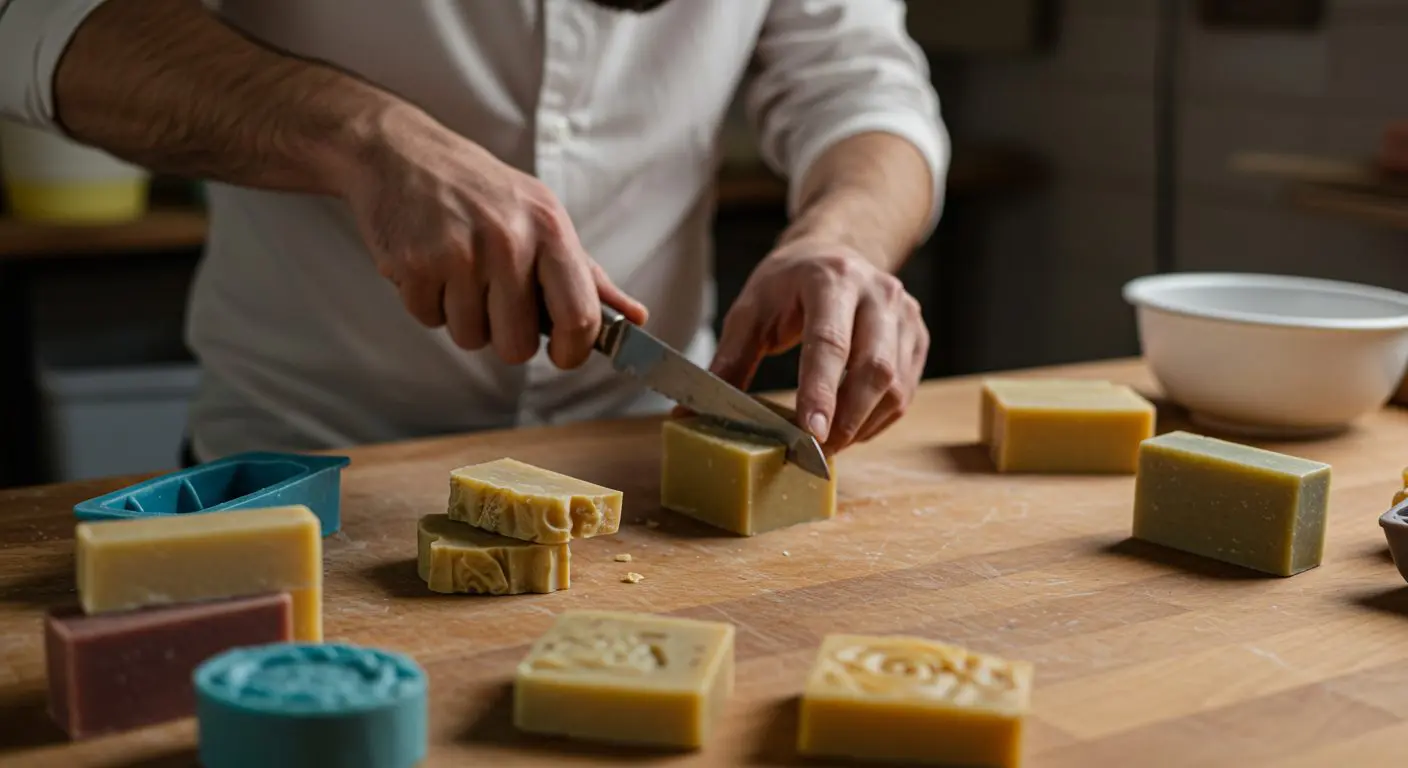
At trace, add your essential oil and any additives, stir gently, and quickly pour into your prepared mold. Tap the mold gently to release air bubbles, cover with a towel (to keep heat in), and let it sit undisturbed for 24-48 hours. After this resting period, you can unmold and cut your soap, then place the bars on a rack to cure for 4-6 weeks. During this curing time, excess water evaporates and the soap becomes milder and harder. Patience creates weekend projects worth waiting for!
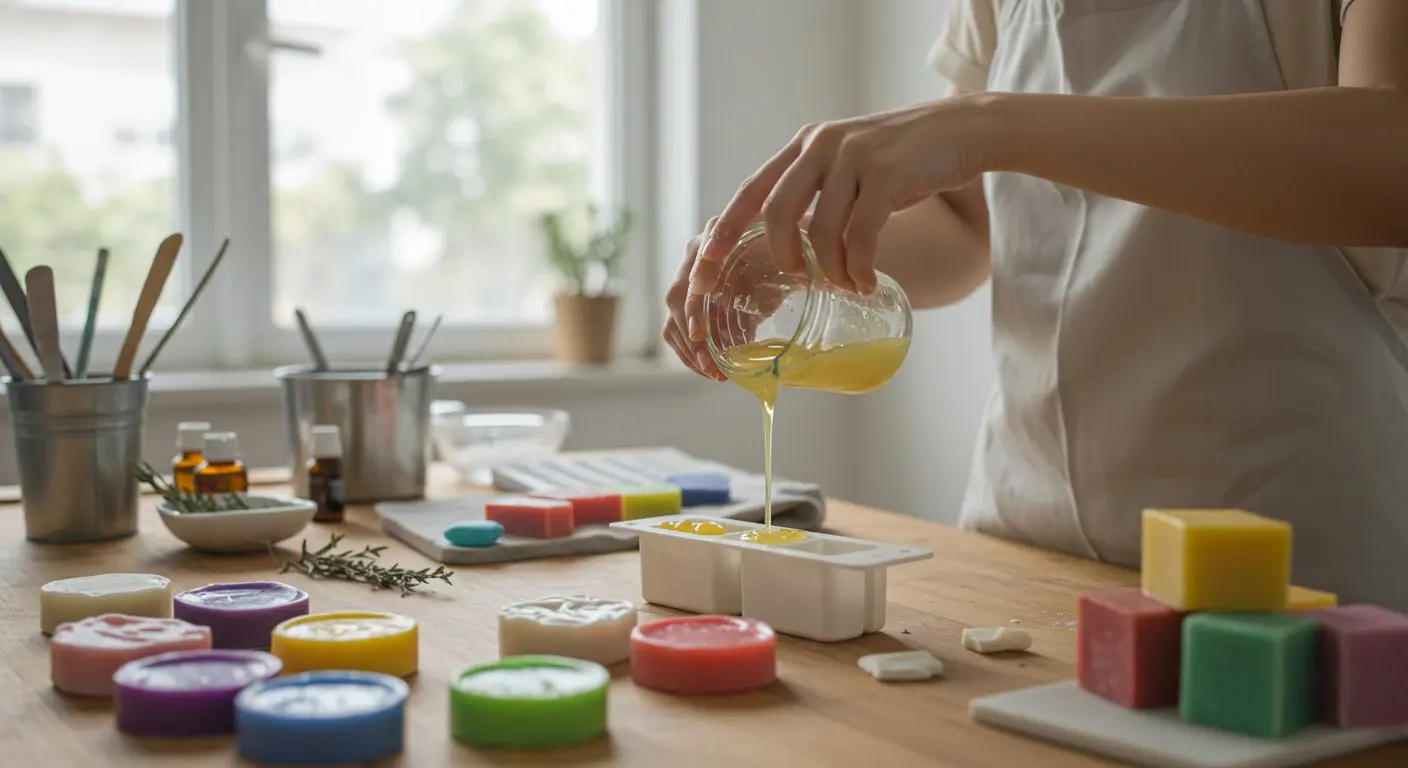
Method 2: Easy Melt and Pour Soap
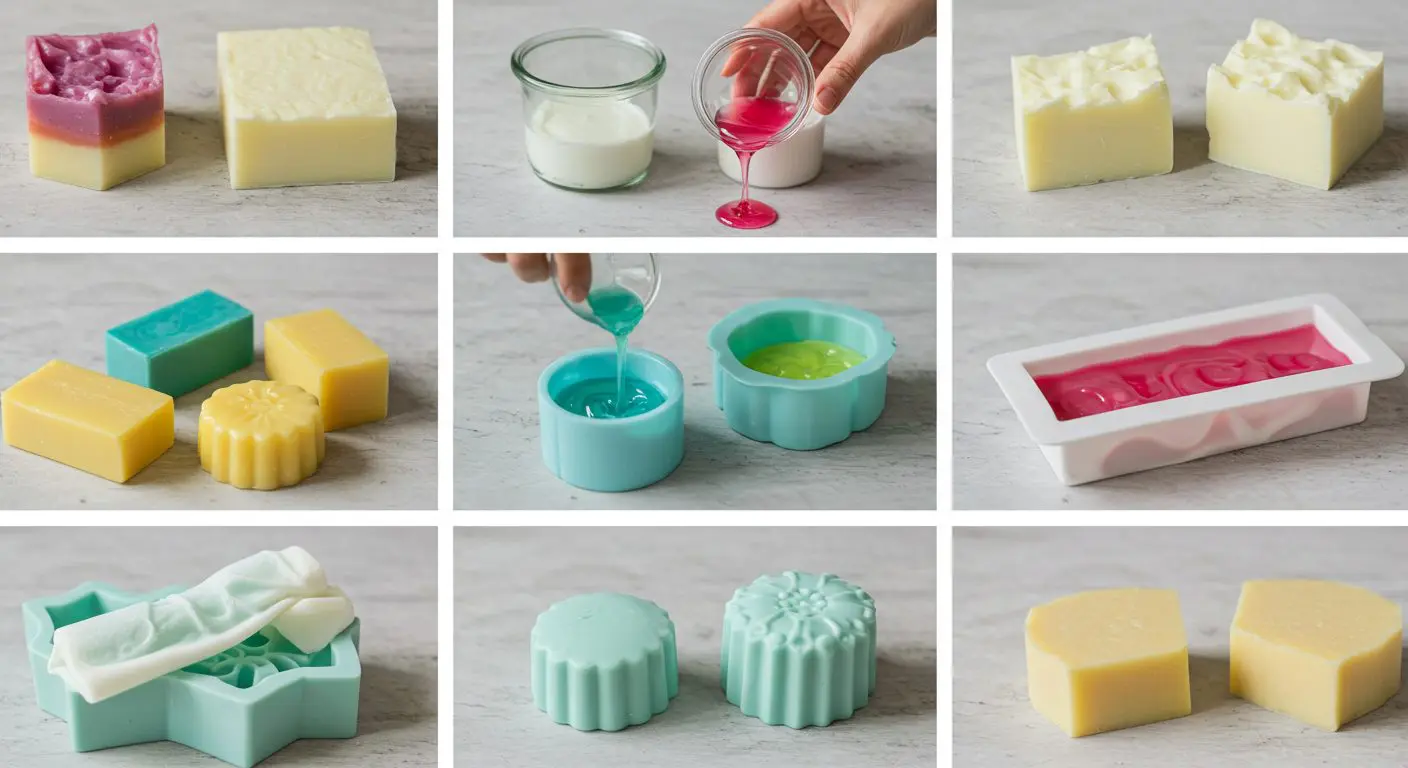
If you’re looking for the quickest entry point into Soap Making for Beginners, melt and pour is your answer! This method bypasses the lye-handling process entirely by using premade soap bases that have already gone through saponification. It’s perfect for crafters who want immediate results or families with curious kids who want to participate.
The simplicity of melt and pour is what drew me in initially. All you need is a glycerin soap base (available in clear, white, goat milk, shea butter, and many other varieties), essential oils or skin-safe fragrance oils for scent, and optional add-ins for color and texture. The equipment required is minimal—just a microwave-safe container, a spoon, and molds.
Here’s what you need for a basic batch:
- 1 pound of melt and pour soap base
- 10-15 drops of essential oil
- 1-2 tablespoons of add-ins like dried herbs, oatmeal, or clay
The process couldn’t be simpler. Cut your soap base into one-inch cubes to help it melt evenly. Place these cubes in a microwave-safe container and heat in 30-second bursts, stirring between each interval. Avoid boiling or overheating, which can degrade the quality of your base. Once completely melted and smooth, remove from the heat.
Now for the fun part—customization! Add your essential oils and mix well. Then quickly incorporate any colorants or additives before the soap starts cooling. Working with a partner makes this part easier, as one person can stir while the other adds ingredients. Pour the mixture into your molds before it starts to solidify. If you notice air bubbles on the surface, a light spray of rubbing alcohol will eliminate them.

The soap will harden within 1-2 hours depending on the size and depth of your molds. Once completely cool and firm, pop them out and your soaps are ready to use immediately—no curing required! This immediate gratification makes melt and pour perfect for last-minute DIY gifts. Just be sure to wrap finished bars in plastic wrap if you won’t be using them right away, as melt and pour soap can attract moisture from the air.
Method 3: Hot Process Soap
Hot process soap making sits beautifully between the complete control of cold process and the simplicity of melt and pour. This method of Soap Making for Beginners accelerates the saponification process through heat, producing usable soap in days instead of weeks. My first experience with hot process left me amazed at how quickly I could create personalized bars!
The ingredient list for hot process soap is identical to cold process, using the same oils, lye, water, and additives. The key difference lies in the cooking step that speeds up the chemical reaction. You’ll need a slow cooker dedicated to soap making (never use it for food again) in addition to your usual soap making tools.
Begin by following the same safety procedures and initial steps as cold process—carefully mixing lye water, preparing your oils, and blending until you reach trace. But instead of pouring into molds at this point, transfer your traced soap batter into your slow cooker set to low heat.
Now comes the cooking phase. Let the mixture cook on low for 45-60 minutes, stirring every 15 minutes. You’ll notice the texture changing dramatically—it will bubble up, collapse, and go through several appearance changes. The soap is done when it resembles mashed potatoes or thick applesauce and has a slightly translucent, Vaseline-like quality. At this stage, the saponification process is complete!
After cooking, let the mixture cool slightly, then stir in your essential oils and any heat-tolerant additives. Working quickly (as hot process soap can thicken fast), spoon the mixture into your prepared molds. Unlike the smooth pour of cold process, hot process has a more rustic, textured appearance that many crafters find appealing.
The wonderful advantage of hot process is the shortened curing time. Because saponification completes during cooking, the soap is technically safe to use after just 24-48 hours of cooling and hardening. However, allowing it to cure for 1-2 weeks improves hardness and longevity. Hot process creates wonderful weekend projects that you can enjoy much sooner than traditional methods.
Common Soap Making Mistakes (And How to Fix Them)
Even experienced soap makers encounter hiccups occasionally. As a Soap Making for Beginners enthusiast, learning these common pitfalls has saved me countless batches and frustration. Understanding what might go wrong—and how to fix it—will give you confidence as you experiment with your own creations.
One of the most common issues is soft, mushy soap that never seems to harden properly. This usually happens when your lye calculations are off, or you’ve used too many soft oils in your recipe. The fix? Let it cure longer (sometimes up to 8 weeks instead of 4), or rebatch it with additional hard oils. For future batches, use a soap calculator to ensure proper lye amounts and balance soft oils with harder ones like coconut or palm.
That mysterious white powdery coating on your soap? Don’t panic—it’s just soda ash, which forms when unsaponified lye reacts with carbon dioxide in the air. It’s completely harmless and only affects appearance. You can prevent it by covering your fresh pours with plastic wrap or spritzing the top with alcohol. If it’s already formed, gently wash it off with water or steam the soap briefly.

If your soap solidifies too quickly during mixing (known as “seizing”), certain fragrance oils are likely the culprit. Some essential oils, particularly citrus and spice varieties, can dramatically accelerate trace. Next time, have everything ready before adding fragrances, work at slightly lower temperatures, and stir by hand rather than using the stick blender after adding these ingredients.
Discoloration sometimes happens when vanilla-containing fragrances turn soap brown, or when certain colorants fade or change. Use vanilla color stabilizer for the former, and research colorant stability for the latter. Testing small amounts before committing to a full batch saves materials and disappointment.

Lastly, if your scent disappears during curing, you might need stronger essential oils or a higher usage rate. Some light scents like citrus are notorious for fading. Anchoring them with base notes like patchouli or using clay in your recipe can help hold fragrances longer. Melt and pour soap typically retains scent better than cold process, making it ideal for fragrant gift soaps.
Cost Breakdown and Getting Started
When I first considered Soap Making for Beginners, I wondered about the initial investment and whether it would be financially worthwhile. After several years of making my own soap, I can confirm it’s both economical and satisfying—especially once you’ve acquired the basic equipment.
Starting with the essentials for cold process soap making, expect to invest around $75-150 for quality equipment that will last for years. This includes a dedicated stick blender ($15-25), digital scale ($10-20), silicone molds ($10-20), safety gear ($25-35), and thermometer ($5-15). Many crafters begin with an all-inclusive starter kit ($25-45) that provides pre-measured ingredients for your first batch.
| Item | Estimated Cost |
|---|---|
| Starter soap kit | $25-$45 |
| Silicone mold | $10-$20 |
| Essential oils | $10-$30 |
| Stick blender | $15-$25 |
| Safety gear + tools | $25-$35 |
For ongoing supplies, a typical 10-bar batch of cold process soap costs approximately $15-25 in raw ingredients, averaging $1.50-2.50 per bar. Compared to artisanal natural soaps that sell for $6-12 each, the savings are substantial. Melt and pour soap is slightly more expensive per bar (about $2-3) due to the processed base, but eliminates equipment costs since you only need a microwave and containers you likely already own.
Where should you source supplies? For beginners, I recommend specialized soap making retailers like Bramble Berry, Wholesale Supplies Plus, or Bulk Apothecary. They offer quality ingredients with detailed information about soap making properties. As you gain experience, you might find better bulk pricing through general suppliers or local sources for some ingredients.

If budget is tight, start with melt and pour for minimal investment while you learn the craft. Many soap makers also save money by repurposing household items—milk cartons lined with parchment make excellent free molds, and certain kitchen tools from thrift stores can be dedicated to soap making. Just remember never to use these tools for food again. Soap making combines beautifully with other creative crafts like woodburning for custom mold making or decorated packaging.
Creating Your Soap Making Legacy
My journey with Soap Making for Beginners started with simple curiosity and has evolved into a fulfilling hobby that connects me to age-old traditions while creating something truly useful. Each bar of soap represents care, creativity, and natural goodness—qualities increasingly rare in our mass-produced world.
The satisfaction of creation never fades, even after dozens of batches. There’s always a new technique to master, an ingredient combination to try, or a design element to perfect. I’ve found soap making to be endlessly absorbing, with each successful batch building confidence and inspiring the next experiment.

Beyond personal enjoyment, handmade soap offers a path to sharing your values with others. Friends consistently comment on how different my soap feels compared to commercial products—gentler, more moisturizing, and seeming to last longer. Many have become converts to natural soap after trying my creations!
For those interested in turning their hobby into something more, soap making can evolve into a modest side business or full-fledged enterprise. Local markets, craft fairs, and online platforms offer venues to sell your creations. Just remember to research cosmetic regulations in your area, as soap with certain claims falls under specific labeling and manufacturing requirements.

Whether you make soap for yourself, as gifts, or eventually for sale, the journey begins with that first batch. Don’t worry about achieving perfection—embrace the learning process and enjoy watching your skills develop over time. The soap making community is extraordinarily supportive, with forums, social media groups, and local guilds where you can share experiences and techniques.
Soap Making for Beginners represents more than just a craft—it’s a return to self-sufficiency, a celebration of natural ingredients, and a way to bring mindfulness into everyday routines. Your soap making adventure awaits, and the beautiful handmade items you create will transform both your bathroom shelf and your relationship with self-care products forever.